Stockinette Stitch Guide for Beginners

Learning to cast on stitches and knit stockinette stitch
Knitting is a hobby that has broken free of age and gender. Today, balls of yarn and needles are in the hands of anyone who wants to spend an evening doing needlework, to step away from an endless stream of thoughts, or to calm their nervous system. Knitting today is a new kind of antidepressant that delivers a cozy, warm, and soft result. Here is how to cast on stitches in the simplest way and learn to knit stockinette stitch — the foundation of all foundations.
The simplest way to cast on stitches with knitting needles
Materials You Will Need
Knit a swatch, assess knitting gauge and yarn tension
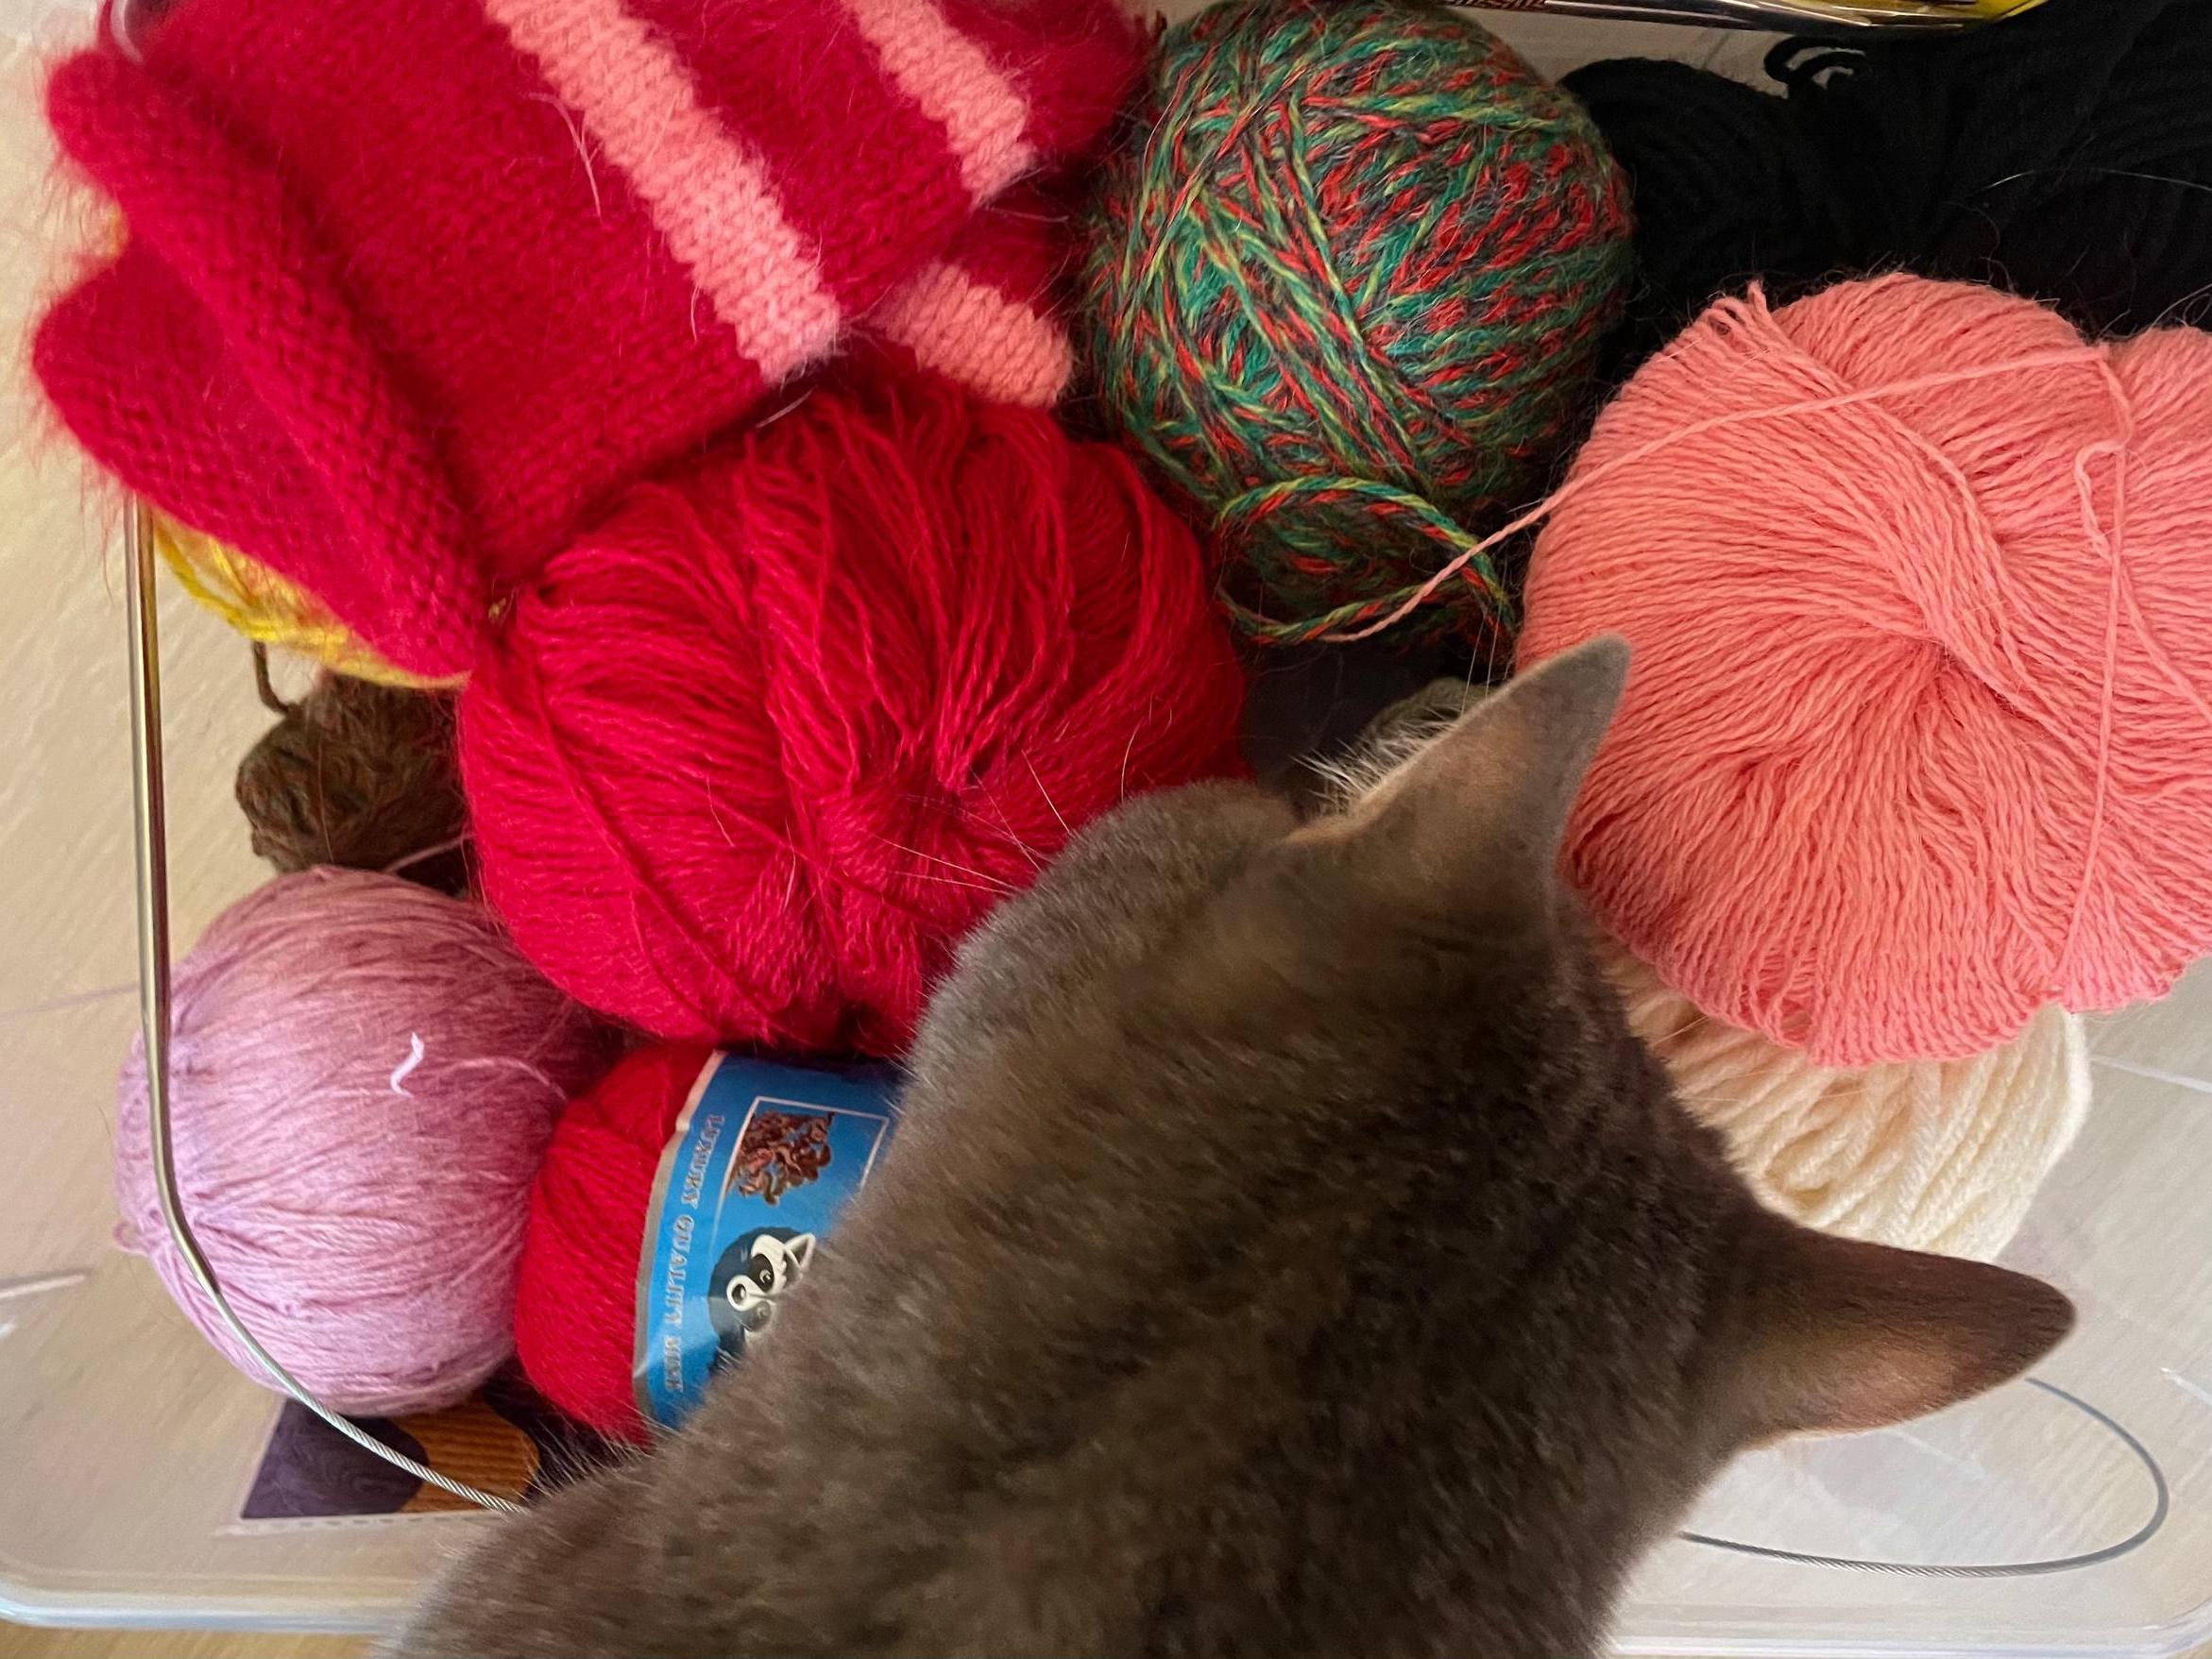
For a first attempt, the following will work well: medium-weight yarn (100–150 m per 100 g), smooth and light in color — it is easier to distinguish the structure of the stitches on it. Needles of the corresponding size — it is usually printed on the yarn label. For a first try, take size 4 or 5 (US 6 or 8). It is preferable that the needles are not too sharp.
Casting On: The Simple Method
This method produces an elastic edge that does not pull the fabric tight. It is done in several steps.
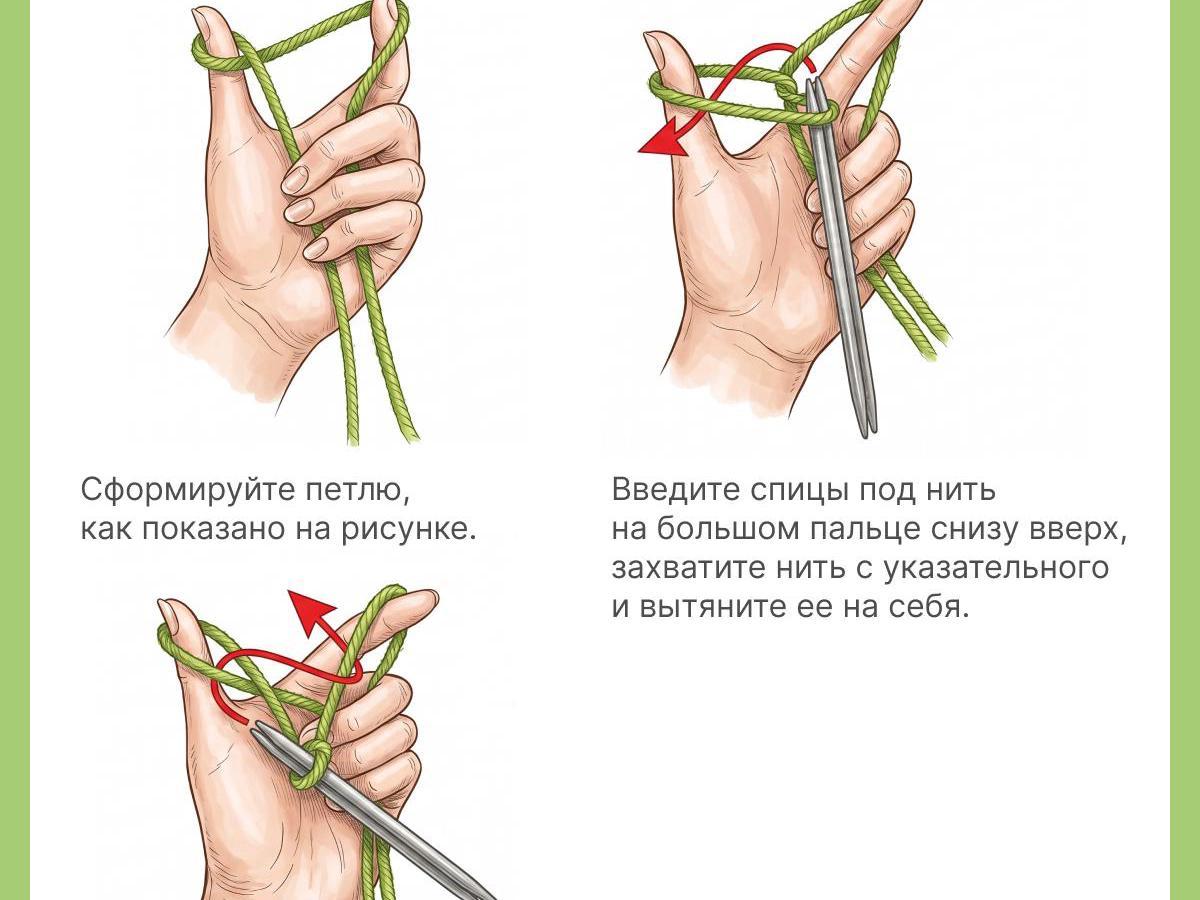
For the cast-on, take a medium-length strand of yarn so that the tail does not end up too long. The end of the yarn should rest on your thumb, while the strand leading to the ball rests on your index finger. It is best to cast on onto two needles at once so that the stitches do not come out too tight.
Insert the needle under the yarn. Make a loop around your thumb and pass the needle under it. Pick up the strand from your index finger. Pull it onto the needle. Tighten the stitches slightly, but not too much, so that knitting is comfortable later on.
Repeat the process as many times as you need stitches. When counting stitches, remember that the first stitch already includes two stitches; this is normal practice.
Stockinette Stitch: The Technique
After casting on, slip one needle out (if you cast on onto two). The working yarn (from the ball) is behind the fabric. Stockinette stitch involves alternating knit and purl rows. Let us start with the knit stitch in the classic way — through the front leg.
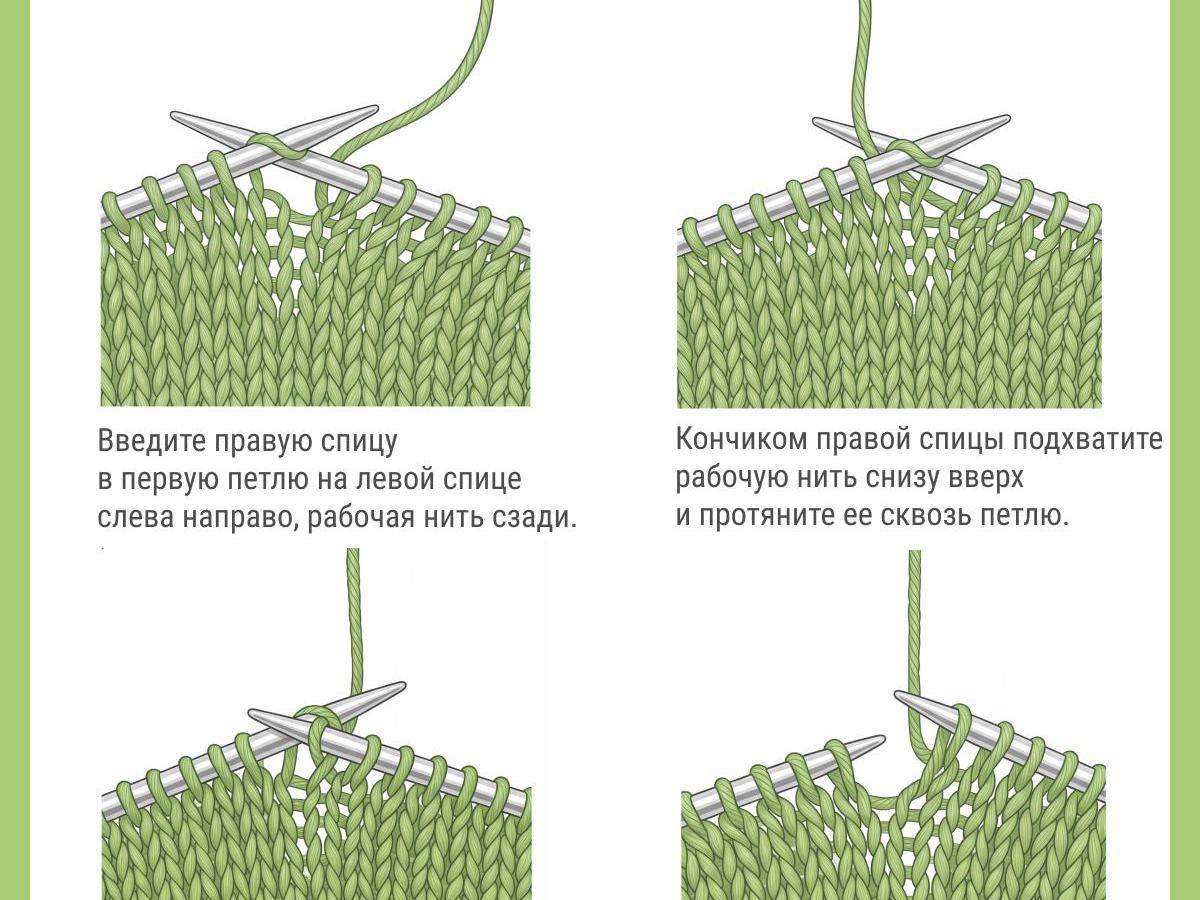
Insert the right needle into the first stitch on the left needle from left to right (working yarn in back).
With the tip of the right needle, pick up the working yarn from bottom to top and pull it through the stitch.
Slip the old stitch off the left needle — a new one remains on the right.
Repeat with all stitches to the end of the row.
To get classic stockinette stitch, the next row must be knitted in purl stitches. Technique: the yarn is positioned in front of the work, insert the right needle into the stitch from right to left, catch the yarn from above, and pull it through.
If purl stitches are still difficult, you can temporarily knit all rows only with knit stitches — this produces garter stitch, but it gives a different texture. For stockinette stitch, you must alternate: row 1 — knit, row 2 — purl, and repeat this pair.
Where to Use Stockinette Stitch
Stockinette stitch is a universal background used in most knitted items. Its special feature is that the fabric comes out even, with clear V-shaped stitches on the front side and horizontal ridges on the back. The edges of stockinette stitch tend to curl — this is taken into account when finishing cuffs, bands, or used as a decorative effect.
Stockinette stitch makes excellent scarves — cast on 30–40 stitches and knit to the desired length, about 150 cm (59 in). The edges can be left unfinished — the natural curl will create a neat, voluminous edge.
A square piece of stockinette stitch is good practice for controlling tension and counting rows. The result of your efforts can turn into a pillowcase or a cozy blanket.
Stockinette stitch can be used as the base for a cardigan: many simple patterns (for example, top-down raglan) are knitted mostly in stockinette stitch, while the pattern is created by colored or variegated yarn.
A Recommendation
First swatches are rarely perfect: uneven stitches, accidental increases or decreases are possible — this is a natural stage of learning. It is recommended to knit a small test swatch of 10 by 10 centimeters (4 by 4 in), assess the gauge, then unravel it and repeat. Practice on small fragments develops even yarn tension and automatic movements more quickly.